
Coverage
Where: SplatPilot tab > Cameras > Coverage, a sub-panel at the bottom of the Cameras panel, closed by default.
How well the cameras see the subject, and where they fall short. SplatPilot measures the coverage of automatic cameras alone, with Indoor or Outdoor and Geometry Cameras, when it places them. For every other camera setup, click Check Coverage.
| Setting | Default | Description |
|---|---|---|
| Check Coverage | Click to have SplatPilot measure how well the cameras see the subject. See Check Coverage. | |
| Title | What was measured, such as “2 used rigs · 64 cameras”. | |
| Verdict | Enough cameras, or what falls short. See The verdict. | |
| Refresh button | Beside a check’s verdict: click to check again. | |
| Surfaces | How much of the surface the cameras see at all. | |
| Directions | From how many directions the cameras see the surface. A surface seen from one side looks right only from that side. | |
| With N Cameras | Indoor and Outdoor automatic cameras that fall short: what twice as many would reach, such as With 296 Cameras “94% of enough”. | |
| Map | Off | The coverage map in the viewport. |
| Problems Only | Off | Only weak and unseen spots. |
| X-Ray | Off | Spots behind surfaces too, faint. |
| Grade, Directions, Detail | Grade | What the map’s colours mean. |
| Legend | Each colour’s share of the surface. | |
| Problem Area ◀ ▶ | 1 | Click to step through the problem areas, largest first, and frame each. |
| Frame button | Click to frame the current problem area again. | |
| Spots | Problem spots in no area, as a share of the surface. | |
| Redundant | Cameras that add nothing. See Redundant cameras. | |
| Select button | Click to select the redundant cameras of collections. | |
| Eye | Shown | Whether the redundant cameras are drawn in the viewport. |
Before anything is measured, you see only Check Coverage in the sub-panel, or “Not placed” for automatic cameras not placed yet. SplatPilot shows the rows from Map down once there is a map, and greys out the ones after it while Map is off.
Check Coverage
Section titled “Check Coverage”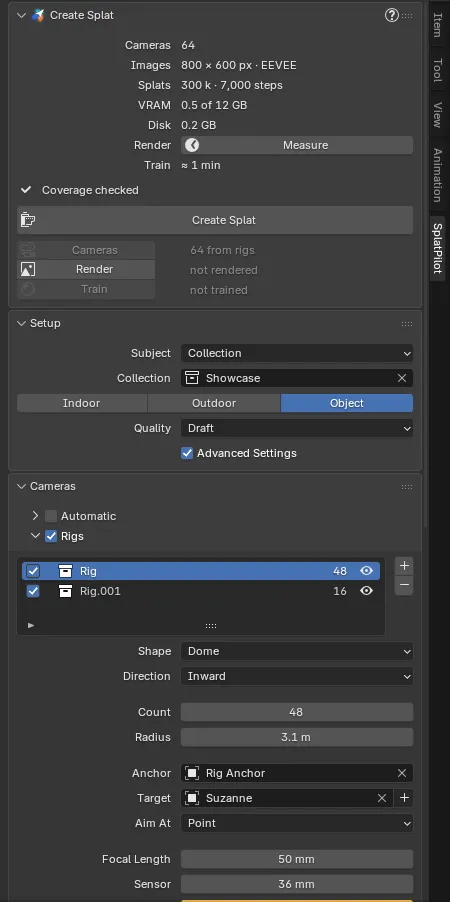
With Check Coverage, SplatPilot renders quick images from every camera in use and measures how well the cameras see the subject together. The images render with Cycles in the background, and you see the progress in the Create Splat panel, with Pause and Cancel. Indoors and outdoors, with Geometry Cameras on, SplatPilot also renders the geometry cameras for the check and reuses them in the next run. SplatPilot keeps the result with the file and turns on Map. SplatPilot spreads the new map out from the cameras over about a second, so you see the spots nearest a camera first.
When the cameras, the subject or a setting the check depends on changes, you see “Outdated” in the sub-panel and Check Again in red. Hover over Check Again to see what changed. After other edits, click the refresh button beside the verdict to check again. For automatic cameras placed for other settings, you see “Outdated” too: click Cameras in the Create Splat panel to place them again.
The verdict
Section titled “The verdict”| Verdict | Means |
|---|---|
| Enough cameras | Both bars are full. More cameras would add little. |
| Not enough cameras | Automatic is on and a bar is short: more cameras would see more. |
| Few directions | Without Automatic, Directions is the shorter bar: the cameras see the surfaces from too few sides. |
| Surfaces unseen | Without Automatic, Surfaces is the shorter bar: the cameras do not see parts of the surface. |
On a full bar you see “Enough”: past that, more cameras add little. On a shorter bar you see how close coverage is to enough, such as “72% of enough”.
The coverage map
Section titled “The coverage map”On the map, SplatPilot draws a dot on the subject’s surfaces for every spot, coloured by its grade:
| Grade | Colour | Means |
|---|---|---|
| Good | Blue | Seen sharply from three quarters or more of the directions it can be seen from |
| Fair | Yellow | Seen from half of them or more, or never sharply |
| Weak | Orange | Seen from under half of them |
| Unseen | Red | No camera sees it |
With Directions, SplatPilot colours the spots by the directions alone: Most, Some, Few or None. With Detail, SplatPilot colours the spots by how sharply the best camera sees them: Sharp, Soft, Blurry or Unseen. Both run from blue to red, like the grades. After a splat trains, the map is off until the next run (see The finished splat).
Problem areas
Section titled “Problem areas”Weak and unseen spots that lie together form problem areas. With Problem Area ◀ 1 / 12 ▶, you step through them, largest first, and SplatPilot frames each in the viewport from a camera position that sees it. SplatPilot marks the current one with a white ring on screen.
In a line below, SplatPilot names the area, such as “Unseen · 14% of surface · 1.7 m across”. For an area seen from too few directions, SplatPilot says in a second line from how many: “Seen from 3 of 9 directions”. Problem spots too small to form an area count as “Scattered spots”, or as “Smaller spots” when there are problem areas too. With none at all, you see “No problem areas” in the sub-panel.
Redundant cameras
Section titled “Redundant cameras”In a check of rigs and collections without Automatic, SplatPilot also finds the cameras you could remove all together without any spot losing its grade. You see their count in the Redundant row, and SplatPilot draws them in pink, crossed, in the viewport while that row’s eye is open. For collections, click the select button to select them, ready to delete. For rigs, you see in a line per rig how many of its cameras are redundant, such as “Rig: 6 of 42”.